
How to Create a Gallery Wall That Tells Your Story

Some of the links on this blog are affiliate links, which means I may earn a small commission if you click through and make a purchase—at no extra cost to you! I only recommend products I truly love and think you’ll find useful too. Thank you for visiting and supporting this blog! To read more about our Affiliate program, click here.
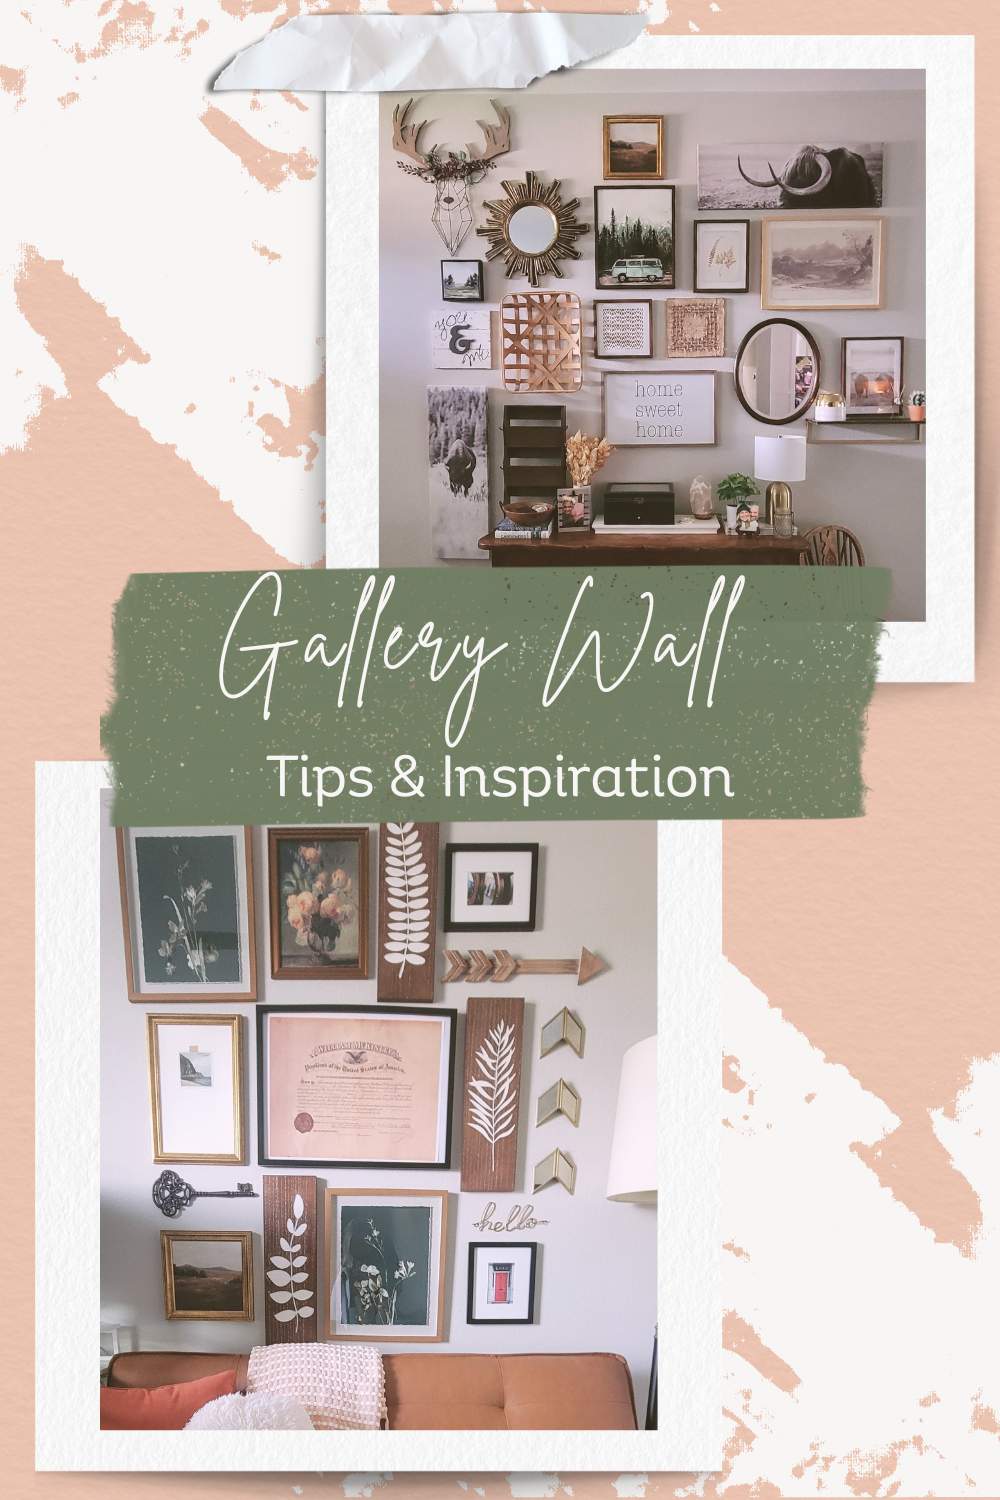
There’s something about a gallery wall that makes a space feel instantly more personal. It’s artful, curated, and a little bit unpredictable—in the best way. Whether it’s family photos, abstract prints, vintage maps, or a mix of all three, gallery walls add texture, warmth, and character that no single frame can achieve alone.
This guide walks you through what a gallery wall brings to your space, how to build one step-by-step, and how to play with frames and mixed materials for a layered, collected look.
Why a Gallery Wall?
A gallery wall does more than just fill an empty space—it tells a story. It creates a focal point, draws the eye up, and brings personality to even the simplest room. A well-crafted gallery wall can make a hallway feel intentional, a living room more dynamic, or a staircase sing with life. And the best part? It’s completely customizable to your taste, your travels, and your memories.
Whether you’re drawn to symmetry or embrace the eclectic, gallery walls can be structured or free flowing. They invite conversation and reflect who you are in a way a single piece of store-bought art never could.
How to Build a Gallery Wall (Without Losing Your Mind)
1. Choose Your Space: Hallways, stairwells, entryways, above a sofa or bed—look for a blank wall that needs a spark.
2. Pick a Theme or Mood: This doesn’t have to be rigid, but having a general vibe helps. Think: coastal calm, black and white family photos, mid-century pop, or travel inspired.
3. Gather Your Pieces: Pull together art prints, photos, textiles, maps, mirrors—anything that feels like you. Lay it all out on the floor first to get a feel for what works together.
4. Plan Your Layout: Use kraft paper cutouts or painter’s tape on the wall to mockup placement before hammering a single nail. Start with your largest piece slightly off-center, then build around it.
5. Hang with Intention: Use picture-hanging hooks or Command strips and keep spacing consistent—typically 2–3 inches between pieces. Stand back and adjust as needed.
We’re letting the imagery do the talking, so keep scrolling for inspiration and links to help your creativity flow
Picture-Only: Clean, Curated, Classic
The Minimalist’s Grid


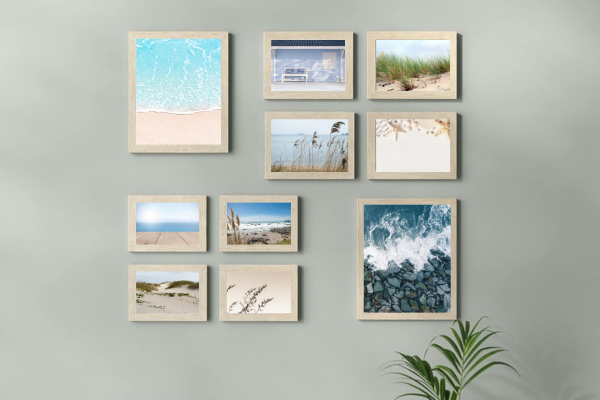
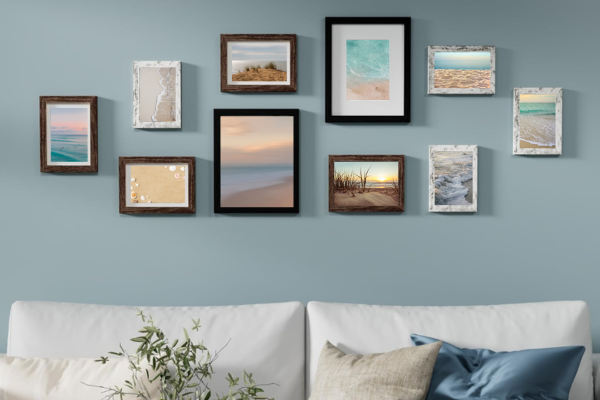
Coastal Collage

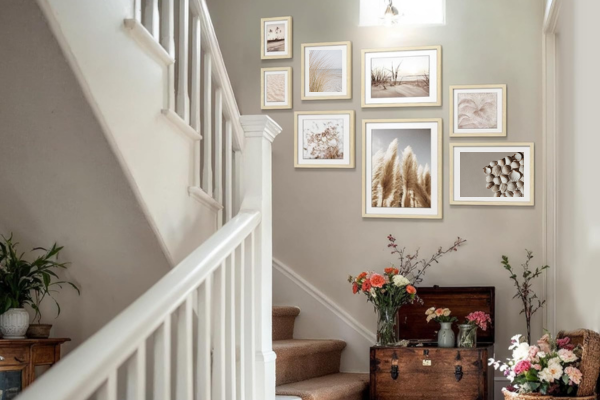
Vintage Lane


Office Inspiration


Beyond Frames: Playing with Mixed Materials
*Heads up! These visuals were whipped up in Microsoft Designer for maximum mood-setting. Think of them as style sneak peeks—they’re mockups, so the final product might do its own thing.
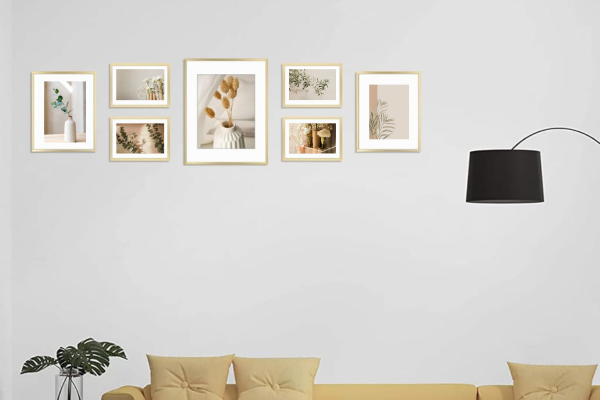
Neutral Territory


Color Pop


Tame Metal


Remember, a gallery wall isn’t just decoration—it’s visual storytelling. It's how a home wears its heart on the wall, frame by frame. Whether you're starting from scratch or updating an existing collection, the key is to lean into what makes your style your own.